Sunday, June 8, 2014

How to: Plum Lips


I absolutely love the look of a dark pink shade or a burgundy shade on the lips because it adds a certain depth and mystery to your makeup look. However whenever I do decide to do a dark lip, I tend to go light on the eyes with mascara and maybe a sweep of light shadow over the lids. Below I will give you tips and tricks of how to pull of a dark look.

If you have just started exploring makeup, I would suggest a tinted lip balm or a gloss. It adds sheer pigment to the lips and introduces you to the colour without making you feel uncomfortable.
Below are a few choices:

A few sheer options
MAC's 'Plumful' is an amazing colour! It is pretty sheer, but still adds a hint of colour to the lips. 
This is my go-to shade, I love the glossy finish and it almost makes my lips look plumper.  
L'Oreal Paris Lip Gloss in shade 101 - Mystic Mauve

Stila Lip Glaze in Shade 27 - Black Cherry


TIP 1 – Save the darker shades for the evenings or a night event. Wearing a dark lip in the morning isn’t the best thing, looks a little odd in my opinion. I have looked odd on several occasions and wouldn’t suggest that.

TIP 2 – Use a precision lip brush. Even though I have fairly fuller lips (I ain’t complaining) I always manage to mess up the edges of my lips. I first swipe the lipstick directly from the bullet onto my lips and then use a lip brush to clean up the edges.

Work your up to the darker shades. Below are a few choices of a mid-tone plum shade. I also ADORE the Revlon ‘Just Bitten Kissable’ Balm stain! They add a tint of colour to your lips and lasts for a very long time, even through meals. CRAZY! I know.

Mid range plums

MACs 'Amorous' - Satin Finish

Revlon Balm Stain in Shade 005 - Crush Beguin

TIP 3 – Add a lip liner. This isn’t a must and I often skip this step when I am in a rush. However, I would recommend adding a plum lip liner because the colour of your lipstick will stay on for a lot longer. And also because if you have already lined your lips, you wouldn’t have to go in with a lip brush. That’s one less brush to wash.

Once you gather the guts and feel confident of pulling of of darker lips, make sure to pick a shade that compliments your complexion. Since I am pretty tan hence darker shades works with my complexion. Choosing a blue undertone shade works best aswell because it makes your teeth look whiter.

The darker and scarier shades I love rocking! 


MAC's Rebel - Satin Finish

Lakme - Wine Whisper

TIP 4 – In order for your lipstick to stay put on your lips and not bleed, add concealer to the edges of your lips. Works wonders for me!


Because I get fed up of posing like a civilized individual


Much Love,
xx


Thursday, June 5, 2014

Review: Maybelline Colour Elixir


Let me explain why you need these babies in your lives.

After the much-heard hype of these lip-glosses, I decided to see what the commotion was all about. I am not a lip-gloss lover, since I prefer having just a sweep of colour all over my lips instead of fussing over the stickiness and shiny-ness of a gloss. BUT to my surprise, I really enjoyed how hydrating and soft they made my lips feel.

That being said, the coloured gloss does initially go on the lips in an uneven manner and I do find myself perfecting the colour till I get the desired opaqueness. I would definitely recommend this product for dry lips, the gloss helped sooth my chapped lips and made them look healthy and kissable. *wink wink*

It has a pleasant smell to it but doesn’t have a yummy taste like all other signature Maybelline lip products. That works in my favour, because I am not too tempted to lick it all off. The lasting powder of this gloss is pretty standard, hence it lasts a good two to three hours without budging.

Shade 060 - Nude Illusion
Shade 065 - Caramel Infused

Shade 025 - Mauve Mystique
Shade 075 - Fuchsia Flourish
Shade 015 - Mandarin Rapture

Priced at CAD $8.96, it is definitely affordable and also offers a wide range of colour selection. Let me just put it this way: GO AND BUY IT.


Much Love, 
xx

Tuesday, June 3, 2014

The Wide-awake Look


This easy-peasy make-up look will make you look put together and like you put a little extra effort to get ready in the morning. Stay tuned for an easy tutorial to feel and look your best with minimal make-up.

1
Start with a clean canvas. I added a bit of Bioderma on a cotton pad to cleanse my face of any makeup residue and sebum.


2
Prime the lids. This is a must for oily-lid people, like myself, because makeup always likes to slip and slide around my face. I prefer my eye shadow to stay on my lids and not melt down my cheeks – yes! It’s that serious. I used MAC’s Paintpot in “Painterly”.


3
Add a sweep of a light matte shade all over the lid to even out any discolouration and hide the viens. I busted out my Naked 2 palette and used ‘Foxy’ all over my lids, right up to the brow bone.


4
An inner corner highlight does wonders to your look because it can really brighten your whole face. I used the shade ‘Bootycall’ from the same palette, which is a white colour with a bit of shimmer.


5
Thank God for concealer! My face has never been this horrendous in a while and hence I am dependent on this product for myself to feel human again – not the best thing. I applied MAC’s Prolong Wear Concealer underneath my eyes and over any hyperpigmentation.


6
Go for a light coverage foundation. I actually mixed my daily moisturizer with Laura Mercier’s Tinted Moisturizer on the back of my hand and applied this mixture all over my face.


7
I finished off the eyes with nude eyeliner in the waterline, because this gives a doll-like effect and works wonders for people with small eyes – ie like myself. Make sure to curl your eyelashes, which will further open your eyes. Then, add your favourite mascara. The nude liner I used was Rimmel’s Waterproof Kohl Kajal in Nude 005 and the mascara is L’Oreal’s Telescopic Mascara.


8
Set your masterpiece in place with powder. I used Maybelline’s Dream Matte Powder.


9
Instead of a blush, go for a light bronzer to bring some colour back into your face. I used Rimmel’s Natural Bronzer in the shade Sun Dance 027. It is probably 2 shades darker than my skin tone and has a little bit of shimmer to it which adds subtle dimension. Add this product underneath your cheekbones.


10
Lipsssss don’t lie! Add a tinted lip balm or a sheer gloss. I applied L’Oreal’s Colour Riche Balm in the shade Tender Mauve 518.


Simple, Fast and Easy! Good Luck tackling the world. Remember to stay strong and never forget that beauty is skin deep.


Much Love,
xx

Now for some sill-ies


Sunday, June 1, 2014

How To: Completely Eradicate Make-up Traces.


No matter how expensive or amazing your skincare routine is, if your skin isn’t stripped of all the makeup residue then your products will fail to give results.
Below, I demonstrate one of the ways I like to remove my makeup.
Please excuse the funny faces (it comes to me naturally).

I start by washing my hands. This is probably the most important step. Make sure to wash your hands before touching your face as this ensures that bacteria will not spread across your face.


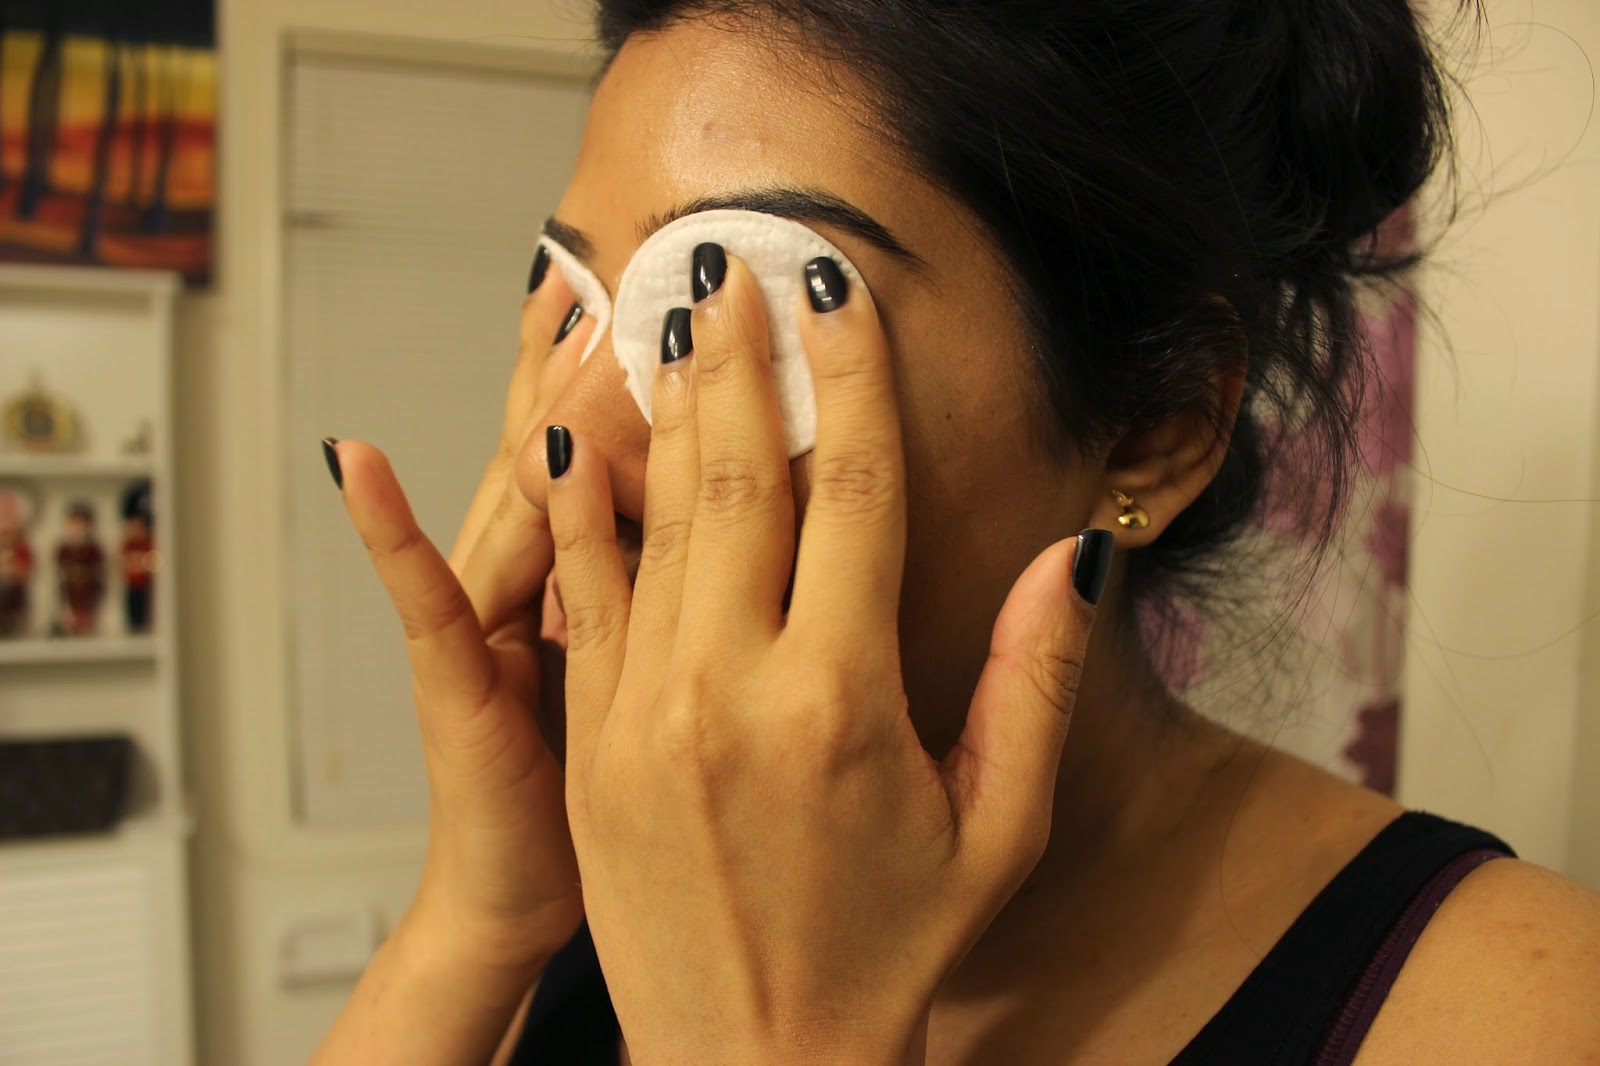
I use Maybelline’s Clean Express makeup remover for my eyes. It’s very delicate and does not sting my eyes and an added bonus is that it is oil-free. I place two blobs of product onto two cotton pads and place them on my eyes for a minute. Then I gently swirl the cotton pads in circular motions and swipe away the mascara and eye shadow.


Moving onto the face: I use Pond’s Cleansing and Exfoliating Towelettes to take off my face makeup. I rub this over and under my eyes to remove any remaining eye makeup as well.


I like to use a delicate exfoliant during the night to remove any dead skin cells. I have been loving Neutrogena’s Deep Clean Daily Scrub. This product is pretty amazing because it keeps my skin feeling clean and soft. Unlike other exfoliants, it doesn't leave my skin felling dry and ashy.


My sister (aka. my photographer, editor, and ma lyfeeeee) and I.
Next step is to tone. I recently purchased L’Oreal’s Sublime Soft Gentle Micellar Solution. It claims to remove makeup and soothe the skin. The instructions state to rub the product all over your face and eyes with a cotton pad. Oh My God! I love this stuff! Although I suspected this product to be like water, let me tell you…it is not. It leaves my skin feeling soft and hydrated. It removes additional makeup and does not burn my skin or eyes.


And that’s a wrap! Time to finish off my skin care routine, hop into my jammies and snore away. I love the fact that this routine takes me 10 minutes and is fool proof!

Obviously I cannot end this blog post without a funny face. 

Much Love, 
xx

Friday, May 30, 2014

A Wearable Smoky-ish Eye.


Don’t we all love a dark and mysterious look? I do. However, there is a very thin line between seeming mysterious and looking like a panda. More times than I would like to admit, I have looked like a panda. Below is how NOT to look like a panda – guaranteed.


TIP: I would suggest applying foundation and concealer after you have worked on the eyes, due to eye shadow fallout.

1 – Add an eye shadow primer. I have chosen Urban Decay’s Eye Shadow Primer Potion in Eden.


 2 – I opted for a deep blue colour, as opposed to a traditional black. I used MAC’s “Contrast” with a smudge brush across the upper lash line. It doesn’t have to be perfect -just focus on getting the colour on your lid. For a smoother transition, I used MAC’s “Quarry” and blended the two colours and taking it right up to your crease. Then blend, and blend some more and keep going until you are satisfied with the outcome.


3 – Add the same “Contrast” shade to your lower lash line to tie the look together. Apply black eyeliner to the upper and lower waterline. I love the look of a bright inner corner because it brings light back into the eyes after the dark colours, hence I added MAC’s “vanilla”.


4 – Curl and apply oodles of mascara.


5 – Finally, add your base. I did my regular face routine. I applied MAC’s Prolong Wear Concealer under my eyes and spot concealed my little friends that have found a home (i.e. my zits). I went in (yes, again) with Maybelline’s Fit Me Concealer under my eyes, which was a shade lighter than my normal skin tone to brighten up my face. For my foundation, I applied L’Oreal’s True Match all over my face with a sponge for a light coverage.  Set everything in place with a powder.


6 – For a healthy glow, I applied Rimmel’s blush in the shade “Pink Sorbet” over the apples of my cheeks, blending upwards.


7 – Go for a nude lip or a light pink shade to let the eyes be the star of the show. I lined my lips with Rimmel’s liner in the shade “Addiction” and, of course, over the top I applied Maybelline’s lip-gloss in  “Nude Illusion”.


TA-DAAAA! All done.
Now for the awkward pictures!


Much Love, 
xx


INSTAGRAM